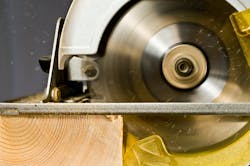
Best Practices for Operating a Circular Saw Safely
A circular saw has a powerful motor. You can think of it as a table saw without the table — therein lies the problem, but also the solution. To use it safely, you want to recreate some table saw advantages while also using table saw safety practices. Below are some tips on doing that. Try to think about the “why” behind each tip, as you read it.
How to prepare for the cut
- Dedicate a cutting area. A table saw isn’t right on top of where you’re using the wood, so don’t bring your circular saw to that area.
- In the dedicated cutting area, use a portable work bench or saw horses to simulate the table saw’s table.
- Ensure the cutting area is clean and free of slipping/tripping hazards. Take a minute with a broom to clear slippery saw dust away from where you need to stand. Also remove any bits of wood or other things you may step on.
- Practice cord management. If you’re using a corded saw, route the cord so you don’t step on it or snag a foot in it. You will have to do this before, during, and after the cut.
- Clamp the work down. Pay close attention to this, as it is key to preventing the saw from kicking back.
- Use a saw guide for long cuts. This will keep the blade straight, reducing the chances of binding and kick back.
- Mark the cut path. You will cut along the outside of the line (not on the line) because the saw blade has width. Ensure nothing is under the cut line of the board you are cutting (e.g., check clamps, your work bench, etc.).
- If there’s a veneer, tape the side opposite the one your saw will be on.
- Add support for the waste piece. If the saw is set up for right hand use, the waste piece will be to your right. Unless it’s small, you want it to stay level. Clamp it down if need be.
- With the saw unplugged, check the blade to ensure it’s the right type for the material, sharp, and adjusted correctly. Generally, you want the blade to extend about ¼ in. beyond the surface you are cutting.
- Set the saw on the board to be cut, and adjust the amount of cord so that when you get to the end of the cut you aren’t pulling against the portable cord.
- Consider wearing cut-resistant gloves. They won’t protect you from a major saw mistake, but they do provide added protection. Don’t wear anything that forces you to grip hard to hold the saw.
- Always wear hearing protection and eye protection.
- Recheck everything: the measurements, the clamping, and the support of the waste piece. Look under the board to ensure you won’t be cutting anything other than the board.
Making the cut
- Ensure the cord is not in the cut path and won’t be in the cut path as you make the cut.
- Place the front of the saw down on the surface to be cut, but don’t touch the blade to the surface.
- Place your free hand (your left, if the saw is set for right hand use) at least 8 in. to the left of the cut line, although 18 in. would be even better. Never put your hand behind the saw because if the saw kicks, you may lose some fingers. Your right hand is protected as long as it is holding the saw handle. Your left hand is protected almost exclusively by being well out of the cut path.
- While looking along the cut line, start the saw, and give it a few seconds to spin freely.
- Taking your time, move the saw along the cut path. Keep your visual focus ahead, not on where the cutting is taking place. This is the same “look ahead” technique you use to drive a car. You want to move your hand to where you are looking, rather than look to where your hand is. That said, you should periodically take a quick glance at the saw to ensure it’s on the cut path. Also check the cord with a quick glance.
- If at some point you must stop the cut, let the saw stop spinning before lifting it. Otherwise, the spinning blade is certain to catch on one side or the other. If you resume in the same cut, start with the blade an inch or so back from the end of the cut.
- As you approach the end of the cut, deliberately slow your forward motion. Why? Because the natural tendency is to speed up, and that usually comes with a bit of a twist that will cause the saw to kick back.
- When the blade almost completes the cut, you will hear a distinct change in pitch. Don’t stop, and don’t release the trigger. Slowly push the saw forward until the entire blade has cleared the cut.
- While leaving the saw sitting on the wood, release the trigger. Wait until the saw completely stops before lifting it off the wood.
- Set the saw down on its motor side, not on its blade. Unplug the saw.
One great benefit of using a saw this way is you get a perfect cut every time. For many people, that is motivation enough — along with knowing you’ll have just as many fingers when you’re finished as when you started.
