The standard concept of maintenance centers on preventing failure or restoring equipment once a failure has occurred.
But in practice, there is more to maintenance than just these two functions. You can think of maintaining the equipment or the function.
If you think of maintaining the equipment, then you don’t have to consider issues of remounting or rewiring because all you are doing is getting the equipment running again with the same components and wiring that are already there. Think of this as akin to keeping your old Android 4.0 phone working; as time goes on, you lose the functionality that justified buying that phone in the first place, even when it works exactly as designed.
But to maintain the desired function of equipment, it is often necessary to replace components in a cabinet. And those replacements often have different mounting footprints and different terminal locations. Many times, an upgrade consists of bringing a hard-wired function into software. Or a safety update may include adding both hardware and wiring.
A cabinet that looks pristine on the first day can look like a bird’s nest only a few years later. This and the awful component layout caused by mounting things where space is available rather than in a dedicated space can make troubleshooting any problem a nightmare. It can also make PM and PdM work much more difficult and time-consuming.
Functional zones
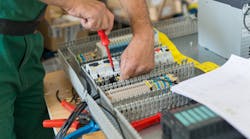
One way to prevent this is to create functional zones within the cabinet and run wiring between them from terminal strip to terminal strip. Eliminate all direct point-to-point wiring to or from any components; all components connect to terminal strips.
So, for example, you have a signal input zone in the upper left and a signal output zone in the lower right. In the middle, you have zones for the other functions (as determined by the control drawings, ladder logic, or other source). There are borders taped or painted around each zone. If you have to replace a component, now the orientation of its mounting is not going to create issues in the cabinet.
When a cabinet comes new from a manufacturer, it is typically going to economize by using point-to-point wiring between components — laid out for convenience of build not convenience of maintenance. It may save money now, but you’ll incur much higher costs down the road.
A relatively small investment upfront to have a manufacturer’s cabinet conform to maintainability and upgrade specifications will pay for itself many times over. You can draw a zone layout by function (or have the manufacturer do it) and require all wiring to and from zones to be from terminal strips rather than directly to components. This creates a clean layout that stays clean no matter how many upgrades or reconfigurations you do on that equipment.
You can further reduce PM costs by adding a terminal strip for test ports. For example, instead of having to locate three RTD terminals, two pressure-sensor terminals, and two control output terminals at various points in the cabinet — and stick your hands into various places in the cabinet — those points are run with jumpers to a single terminal where all the testing points are accessed. This means less time in the cabinet and less chance of introducing the all-too-common “maintenance error” that is a major contributor to downtime.
Retrofitting all existing cabinets is probably not a good idea. But for new cabinets, using this method is a good practice that should only rarely not be undertaken. It’s often worth doing when there’s a major upgrade or when maintenance has become too difficult due to the bird’s nest effect.


