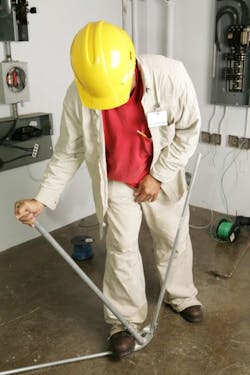
Most electricians spend a good amount of time bending metallic raceway. If you’re one of those electricians, are you doing this efficiently with good results? Many of the methods used in the field actually waste time and don't reach the level of quality that marks a well-done installation.
We have a six-step solution to that problem:
Step No. 1: Deburr the end
If you cut tubing or conduit, it’s almost certain there’s a burr in it. This burr can slice through conductor insulation. Many electricians use a screwdriver as a deburring tool, but the result often is just a flatter burr that can unflatten during a wire pull. Use a reaming tool made specifically for this purpose, to ensure the conduit or tubing end is smooth and burr-free.
Step No. 2: Mark the start
Now that you’ve got a stick that won’t slice your fingers or the wire you intend to pull through it, how do you know where to start the bend? Measure the distance your finished work will need from the box to the start of the bend. Then measure this distance from the end of the raceway and mark the other end as where the bend starts. Note that “from the box” means where the end of the raceway will be when inserted into the fitting.
Step No. 3: Mark the middle
This is typically where things go wrong. First, make sure your bender has the correct shoe for the type of raceway (e.g., rigid metal conduit or electrical metallic tubing). If not, change the shoe. Don’t assume that a shoe for tubing will work for conduit; verify the shoe you’re using is correct. If you’re using a good bender and shoe, the shoe will have markings that show the location of the middle of the bend for the size raceway you’re using. If you’ve got a cheap knockoff, now you see you didn’t save any money. On the raceway, begin at your starting mark and measure this distance going away from the starting end. Jot down this number. Then mark this spot as the middle point.
Step No. 4: Play it in reverse
You really want to make sure you have marked everything correctly. This clever trick has you checking things from the reverse direction, which is a good way to avoid the “Why didn’t I see that” type of error. How do you do it? Find a wall with some clear floor space in front of it, and put the raceway on the floor with its start end against that wall. Put the end of your tape on the wall, and measure back to the “middle” mark you made. Compare the measurement with the number you jotted down earlier. If there’s a difference, repeat step no. 3.
Step No. 5: Do a dry run
Many electricians skip this step thinking they are saving time, but doing this step consistently saves time in the long run. Carpenters have an adage, “Measure twice, cut once.” Here, the principle plays out as “Measure thrice, bend once” (remember, we’ve already measured it forward and backward). This step involves “measuring” with your trained eye. Take that marked-up stick and eyeball it against the intended location. Is the bend in the right direction? Answering that question avoids the most common mistake. If it looks like the right direction and the distance eyeballs out OK, proceed to the next step.
Step No. 6: Make the bend
If you’re using an electric bender, place the raceway in the shoe and adjust its position to align with the marks you made. Then make the bend. If you’re using a manual bender (“hickey”), go back to that wall you made friends with earlier. Set the raceway on the floor with the "start" end against that wall. Slide the hickey over the free end. Align the raceway "bend" mark with its counterpart on the hickey. Pull gently on the handle and increase force as it starts to move. Apply steady pressure through the bend, reducing that pressure as the raceway approaches the desired angle. This method avoids introducing hysteresis into the metal, something that happens when you bend it back and forth to get the desired angle.
