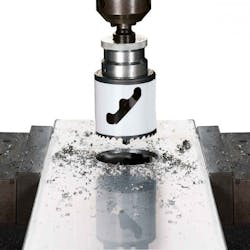
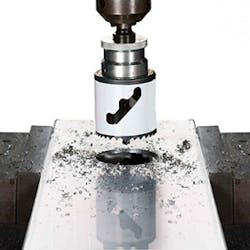
Suppose you need to modify an enclosure by drilling a hole in it to install a drain (or for some other purpose). How can you do this in a way that leaves a perfect hole with a minimum of work?
First, ensure you’re using an industrial grade drill rather than a consumer grade one. The industrial grade drill has more power, stays truer when drilling, and lasts longer. Don’t try to save money by purchasing a low-price drill you’ll be replacing every month.
Typically, the center of a hole lines up on the centerline of an enclosure panel. But, depending upon where you need to make the hole in the enclosure and where that hole will be facing when the enclosure is installed, you may have to offset things.
Carefully “stage” the hole for the application before deciding where to put it. Make sure the hole won’t be in the wrong place in reference to other equipment or objects once the enclosure is installed.
For example, one electrician drilled a perfect hole in a cabinet only to find out the hole side of the cabinet was going to be facing process piping. He looked at that, trying to imagine how he could possibly get a good routing path for the raceway. In the end, he had to install a plug in that hole and do the same job all over again on the other side of the enclosure.
Once you’ve decided on where to place the hole, then decide on what size hole. You really have only one shot at this.
One technique people use for “upsizing” a too-small hole is to “warble” the drill. This not only leaves an ugly hole, it puts undue stress on the bearings of the drill. A drill that’s been abused this way starts having shaft wobble and not only fails to drill straight but is dangerous to use. The correct solution is to drill the right-sized hole the first time.
Measure the exact external dimensions of whatever is going into that hole. Then select a hole saw or drill bit that will produce a hole to accommodate that item.
To protect the painted surfaces, use masking tape on both sides of where the hole will be. It’s best to use a single strip. Masking tape comes in many widths.
Now draw a line for the horizontal location and one for the vertical. The cross-hair of these lines is where you will use your hole punch to make a pilot dent in the panel. There are spring-loaded punch tools for this purpose, but if you don’t have one, you can use a hammer to lightly tap a standard metal punch. All you want to do is just barely mark the surface, so re-read that “lightly tap” part; it does not mean strike a sharp blow.
Next, determine if your hole saw or drill needs a pilot hole, and if so, what size. If you are using a hole saw, this pilot hole needs to be much smaller than the center drill bit on the hole saw.
Before you drill, put a catch cloth or bucket under the work. This will save you time in trying to clean up shavings. Before you drill, don work gloves. Many people think this is unnecessary, and those same people cut their fingers on the hole they just drilled and call that an accident.
Of course, because you are using rotating equipment you are also going to wear your safety glasses and make sure that if you have on long sleeves they are rolled up to at least your elbows.
Since you have an industrial drill, you have a drill with a variable speed function. Use this to slowly begin the hole, making sure the drill is straight to the work in all three space dimensions.
Take your time drilling or cutting, rather than pushing the saw or bit through. You’re not going through a very thick surface, and you want to avoid breaking through and ripping the metal. You want the saw or bit to have time to cut the metal.
If you go at the correct speed, the hole will be perfect with no burrs. But it may have a sharp surface. Use a rat tail file to do a few quick “runs” around the inside of the hole. On the off chance you actually did get a burr, that should come off at this time as well.
Use a magnet to pick up any stray bits of metal. Remove your drop cloth or bucket. Remove the tape.
You now have a hole that you made without needing to adjust, rework, or repaint. You didn’t really even need to clean up afterwards. You didn’t damage the enclosure, your drill, your fingers, or your eyes, either.
About the Author

Mark Lamendola
Mark is an expert in maintenance management, having racked up an impressive track record during his time working in the field. He also has extensive knowledge of, and practical expertise with, the National Electrical Code (NEC). Through his consulting business, he provides articles and training materials on electrical topics, specializing in making difficult subjects easy to understand and focusing on the practical aspects of electrical work.
Prior to starting his own business, Mark served as the Technical Editor on EC&M for six years, worked three years in nuclear maintenance, six years as a contract project engineer/project manager, three years as a systems engineer, and three years in plant maintenance management.
Mark earned an AAS degree from Rock Valley College, a BSEET from Columbia Pacific University, and an MBA from Lake Erie College. He’s also completed several related certifications over the years and even was formerly licensed as a Master Electrician. He is a Senior Member of the IEEE and past Chairman of the Kansas City Chapters of both the IEEE and the IEEE Computer Society. Mark also served as the program director for, a board member of, and webmaster of, the Midwest Chapter of the 7x24 Exchange. He has also held memberships with the following organizations: NETA, NFPA, International Association of Webmasters, and Institute of Certified Professional Managers.

